
Quick Start Guide
Get up and running with TARE's ELN, LIMS, and documentation support workflow in less than 5 minutes.
Welcome to TARE (Technical Analysis & Research Environment). This guide helps you configure your lab workspace, map your physical space, and start using Ask TARE without bypassing audit controls.
1. Define Space
Map your physical lab hierarchy so you always know where samples are located.
2. Invite Team
Add chemists, researchers, and admins to collaborate in real-time.
3. Track Items
Scan barcodes or bulk import your existing chemical inventory.
4. Turn on documentation support
Ask TARE is available across dashboard pages. Enable voice-first assistance in Preferences only when you want hands-free operation.
Detailed Steps
Create your Organization
When you first sign up, a default organization is created for you. Navigate to Settings > Organization to upload your logo and set your official lab name. This branding will appear on all generated reports and labels.
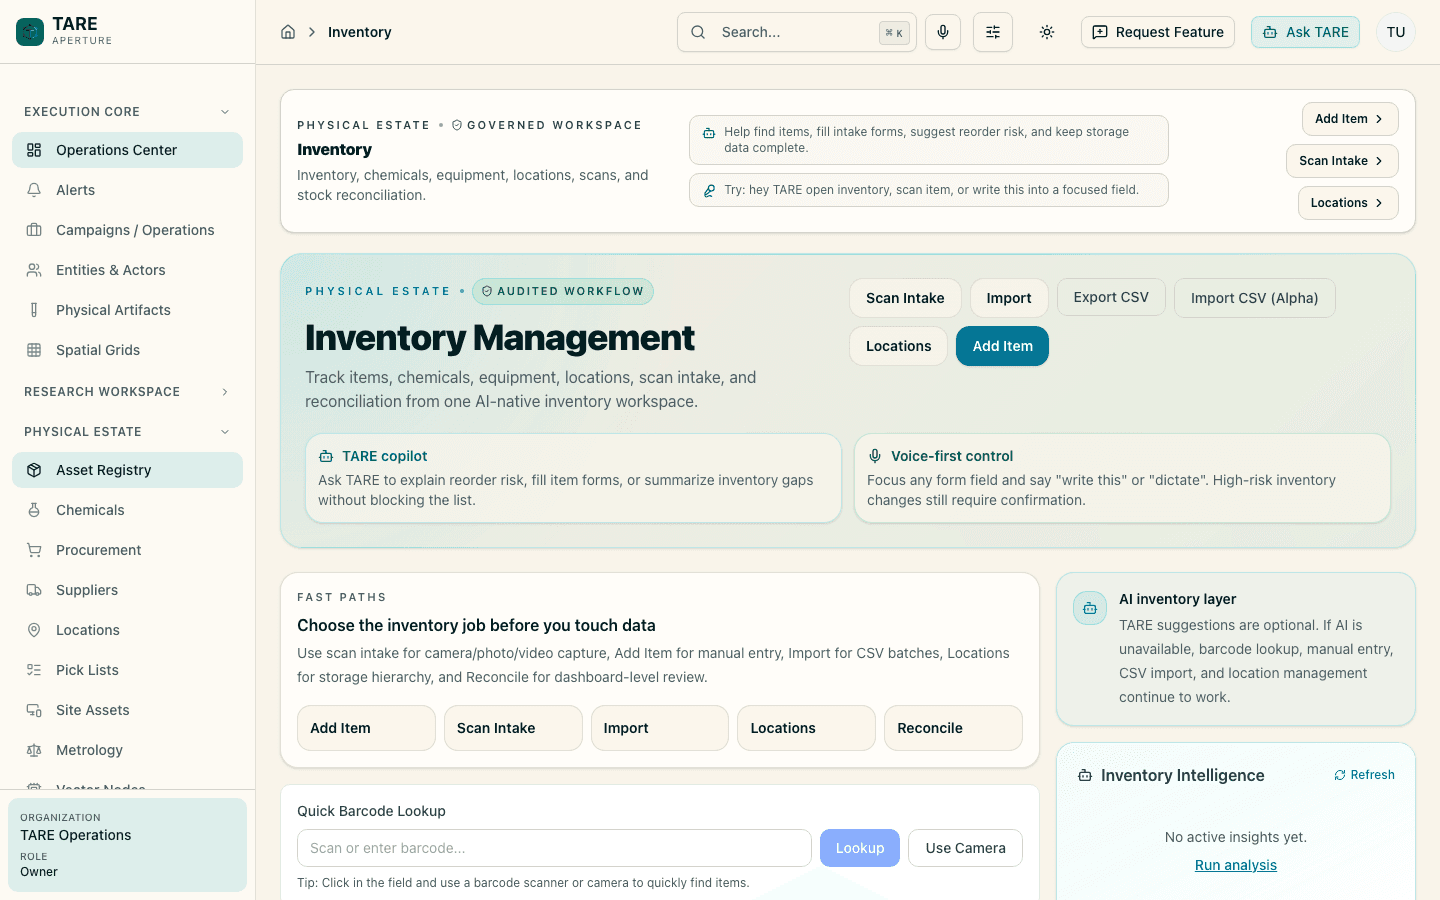
Set up Locations
Go to Inventory > Locations. Create a top-level location (e.g., "Main Lab") and nest storage units inside it (e.g., "Main Lab" > "Flammables Cabinet" > "Shelf A").
Import Inventory
If you have an existing Excel sheet, use the Import entry point on the Inventory dashboard. For bench intake, use Scan Intake to create items from a photo, video, or manual entry.
Pro Tip
Install the TARE Progressive Web App (PWA) on your tablet or mobile device for barcode scanning, scan intake, and location checks directly from the bench.